
idoo hydroponics growing system manual pdf
iDOO Hydroponics Growing System Manual: A Comprehensive Guide
Welcome! This guide details setup, operation, and maintenance for your iDOO ID-IG201/ID-IG301S hydroponic system. Enjoy year-round, soil-free gardening indoors with ease!
Welcome to the world of effortless indoor gardening! The iDOO Hydroponics Growing System offers a revolutionary approach to cultivating fresh herbs, vibrant vegetables, and even delicious fruits right in your home, regardless of the season. This innovative system eliminates the need for soil, utilizing a sophisticated hydroponic method that delivers nutrients directly to the roots, fostering remarkably faster growth and higher yields.

Designed for both beginners and experienced gardeners, the iDOO system simplifies the growing process. It features a self-contained water circulation system, ensuring optimal hydration and nutrient distribution. Coupled with advanced LED grow lights, your plants receive the perfect spectrum of light for each growth stage, maximizing their potential.
This manual serves as your comprehensive guide, providing step-by-step instructions for setting up, operating, and maintaining your iDOO ID-IG201 or ID-IG301S model. We’ll cover everything from germination to harvest, ensuring a rewarding and bountiful gardening experience. Remember, the product’s appearance may vary slightly from images, but functionality remains consistent. Stay tuned for potential software updates!
System Models & Overview (ID-IG201 & ID-IG301S)
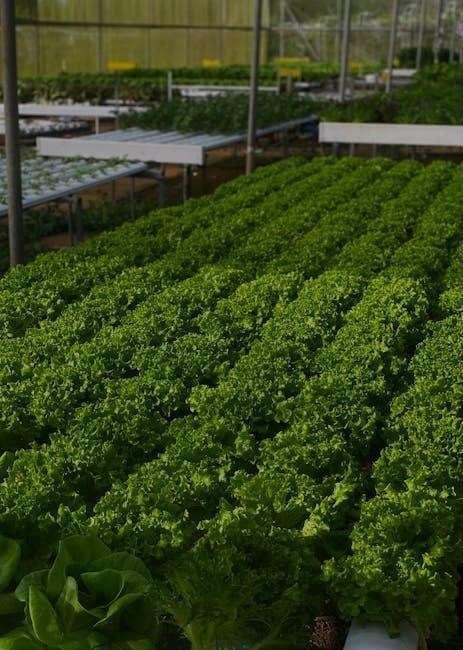
The iDOO hydroponic family currently features two primary models: the ID-IG201 7-Pod Hydroponics Garden Kit and the ID-IG301S Hydroponics Growing System. Both systems are designed for indoor use, offering a convenient and efficient way to grow plants without soil. The ID-IG201 is ideal for smaller spaces and beginner gardeners, accommodating up to seven plants simultaneously.
The ID-IG301S, a more advanced model, provides expanded capacity and enhanced features for larger-scale indoor gardening. Both systems utilize a water circulation system to deliver nutrient-rich water directly to the plant roots, promoting rapid growth. They also incorporate full-spectrum LED grow lights, optimized for various growth stages.
Key components common to both models include a water tank, grow baskets, rockwool cubes for germination, and a smart control panel; The ID-IG301S may include additional features like a larger water reservoir and more sophisticated lighting controls. Please note that the physical appearance of your product may differ slightly from illustrations in this manual.
Safety Precautions & Warnings
Important Safety Instructions: To minimize the risk of injury, carefully read and understand all instructions in this manual before operating your iDOO hydroponics system. This appliance is intended for indoor household use only. Do not use outdoors or in damp environments.
Electrical Safety: Always ensure the power cord is dry and undamaged. Never operate the system with a damaged cord or plug. Avoid using extension cords. If the system malfunctions or exhibits signs of electrical issues, immediately unplug it from the power outlet.
Water & Nutrient Handling: Use only purified water in the system. Avoid contact between water and the electrical components. Handle nutrient solutions with care, following the manufacturer’s instructions. Keep nutrient solutions out of reach of children and pets.
General Precautions: Do not disassemble or modify the system. Supervise children when they are near the hydroponics system. Regularly inspect the system for any signs of wear or damage. Disconnect the system before cleaning or performing maintenance.
Unboxing & Component Checklist
Carefully unpack your iDOO Hydroponics Growing System and verify that all components are present and undamaged. The package should include the following:
- Hydroponics Base Unit: The main housing for the water reservoir, pump, and control panel.
- Grow Deck (7 or 12 Pods): The platform to hold the plant baskets and rockwool cubes (depending on model).
- LED Grow Light: Provides the necessary light spectrum for plant growth.
- Power Adapter: Supplies power to the system.
- Water Pump: Circulates water and nutrients throughout the system.
- Rockwool Cubes: Used for seed germination and initial plant support.
- Plant Baskets: Hold the rockwool cubes and plants in the grow deck.
- Nutrient Solution (A & B): Provides essential nutrients for plant growth.
- User Manual: This document!
If any components are missing or damaged, please contact customer support immediately. Retain the original packaging for potential returns or warranty claims. The appearance of the product may vary slightly from images in this manual.
Step 1: Understanding Hydroponic Growth Principles
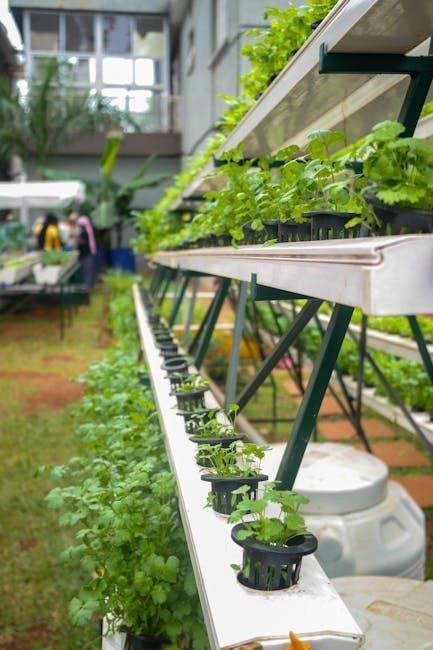
Hydroponics is a method of growing plants without soil, utilizing mineral nutrient solutions in a water solvent. Plants receive essential elements directly through their roots, promoting faster growth and higher yields compared to traditional soil-based gardening. The iDOO system employs a recirculating hydroponic method, where the nutrient solution is continuously circulated, delivering oxygen and nutrients to the roots.
This system eliminates soilborne diseases and pests, offering a cleaner and more controlled growing environment. Key benefits include water conservation, efficient nutrient uptake, and the ability to grow plants year-round, regardless of external weather conditions. Understanding this principle is crucial for successful operation.
The circulating water ensures roots remain oxygenated, vital for healthy development. The LED grow light provides the necessary light spectrum for photosynthesis, mimicking natural sunlight. This combination creates an optimal environment for robust plant growth.
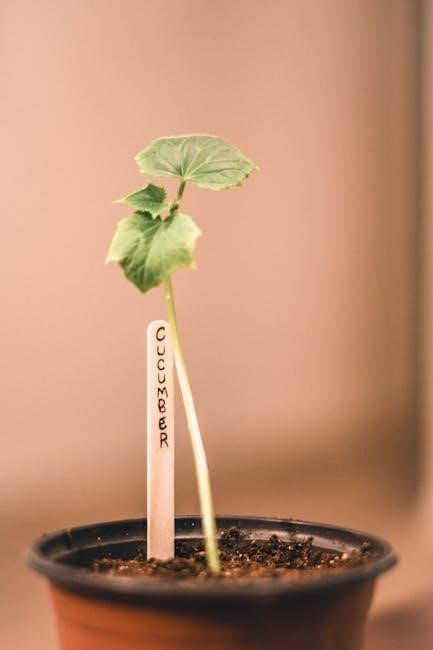
Step 2: Germination – Using the Germination Tray & Rockwool
Successful germination is the foundation of a thriving hydroponic garden. The iDOO system utilizes a germination tray and rockwool cubes to initiate seed sprouting. Rockwool provides an inert, sterile medium that retains moisture and allows for excellent aeration, crucial for root development.
To begin, thoroughly moisten the rockwool cubes with purified water. Gently insert seeds into the pre-made holes in the cubes, ensuring they are covered but not buried too deeply. Place the cubes within the germination tray, maintaining consistent moisture – avoid overwatering, which can lead to damping-off.
Keep the germination tray in a warm, well-lit location, ideally under the grow light. For best results, maintain a water level between 2L and the MAX line. Remember, roots need air, so avoid exceeding the maximum fill line. Monitor daily for sprouting, typically within 2-7 days, depending on the seed type.
Step 3: Preparing the Hydroponics System for Planting
Once your seeds have germinated and developed initial roots in the rockwool cubes, it’s time to prepare the iDOO hydroponics system. Begin by ensuring the water tank is clean and filled with purified water to the appropriate level – between 2L and the MAX line indicated. Avoid overfilling, as roots require air circulation.
Next, carefully place the germinated rockwool cubes into the designated planting baskets. These baskets will securely hold the seedlings within the hydroponic system. Ensure the roots are gently extended downwards, towards the water reservoir.
Now, position the planting baskets into the holes on the iDOO system’s growing deck. Confirm each basket is stable and securely seated. Finally, prepare the nutrient solution according to the guidelines in the ‘Nutrient Solution Management’ section. Add the appropriate amount of nutrient solution to the water tank, and power on the system.
Water Level & Quality Guidelines
Maintaining optimal water levels and quality is crucial for successful hydroponic growth. Always use purified water to minimize mineral buildup and ensure plant health. Tap water may contain chemicals harmful to plants, impacting nutrient absorption and overall growth.
The ideal water level within the iDOO system’s reservoir should consistently be maintained between 2 liters and the “MAX” line. Do not exceed the MAX line, as this can lead to root suffocation due to lack of oxygen. Regularly check the water level, especially during warmer months or when plants are actively growing, as evaporation will occur.
For best results, change the water completely every 1-2 weeks, or more frequently if it appears cloudy or algae begins to form. This prevents nutrient imbalances and maintains a healthy environment for root development. Consistent monitoring and adherence to these guidelines will significantly contribute to thriving plants.
Nutrient Solution Management
Proper nutrient solution management is vital for providing your plants with the essential elements they need to flourish in a hydroponic system. The iDOO system requires a balanced hydroponic nutrient solution specifically formulated for vegetative and flowering stages – follow the nutrient manufacturer’s instructions carefully for dilution ratios.
Begin by adding the recommended amount of nutrient solution to the water reservoir after each water change. Monitor the pH level regularly using a pH testing kit; the ideal range for most hydroponic plants is between 5.5 and 6.5. Adjust the pH as needed using pH up or pH down solutions.
Observe your plants closely for signs of nutrient deficiencies, such as yellowing leaves or stunted growth. Adjust the nutrient concentration accordingly, but avoid over-fertilizing, which can be detrimental. Regularly inspect the reservoir for sediment buildup and clean as needed to maintain optimal nutrient availability.
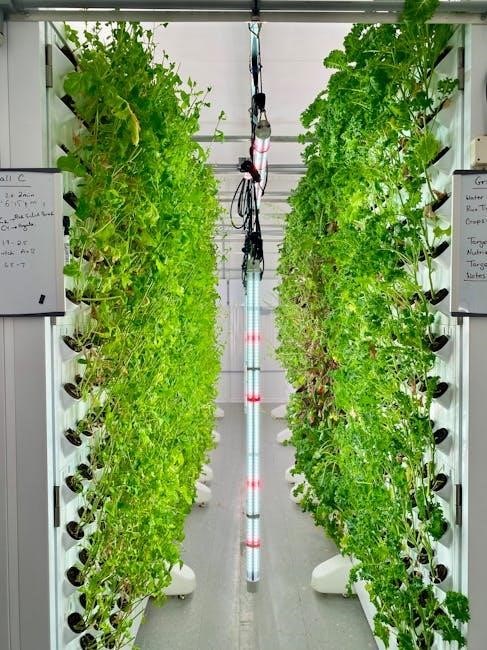
LED Grow Light Modes & Operation
The iDOO hydroponic system features an integrated LED grow light designed to support plant growth throughout all stages – from seedling to harvest. This system boasts four distinct lighting modes, each optimized for specific growth phases, ensuring your plants receive the ideal light spectrum and intensity.
These modes include a blue light-focused mode for vegetative growth, promoting strong leaf and stem development; a red light mode for flowering and fruiting, encouraging bud formation and yield; a full-spectrum mode combining red and blue light for overall growth; and an automatic mode that cycles through the different spectrums.
To operate, simply connect the power adapter and use the control panel to select your desired lighting mode. The lights are programmed with specific lighting times for each mode, but you can also customize the duration to suit your plants’ needs. Ensure the lights are positioned at the appropriate distance from the plants to avoid burning.
Understanding the 4 Lighting Modes
Your iDOO hydroponic system’s LED grow light offers four specialized modes to cater to every stage of plant development. Mode 1 utilizes a predominantly blue light spectrum, ideal for seedling and vegetative growth. This encourages robust leaf and stem development, laying a strong foundation for your plants.
Mode 2 shifts to a red light spectrum, optimized for the flowering and fruiting stages. Red light stimulates bud formation, fruit production, and overall yield. Mode 3 provides a full spectrum, blending red and blue light for balanced growth, suitable for all-around plant health.
Finally, Mode 4 is an automatic mode, intelligently cycling through the different light spectrums to mimic natural sunlight patterns. This provides a convenient, hands-free option for consistent growth. Each mode is pre-programmed with optimal lighting times, but customization is possible to meet specific plant requirements. Understanding these modes allows you to maximize your plants’ potential.
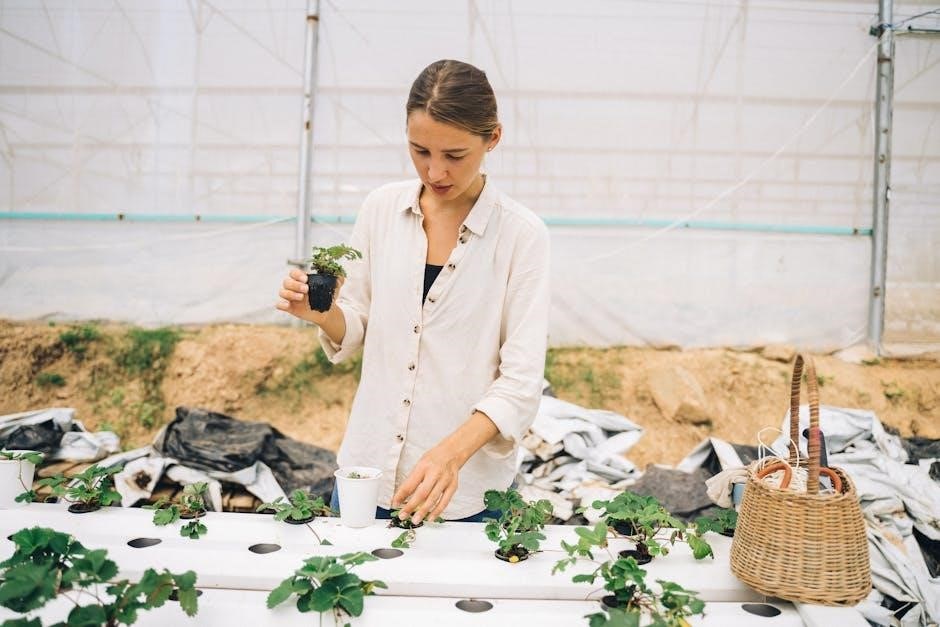
Planting & Transplanting Instructions
Once your seedlings have established roots in the rockwool cubes (typically after germination in the tray), it’s time for transplanting. Gently remove the sprouted seedling with its rockwool cube from the germination tray, being careful not to damage the delicate roots. Insert the rockwool cube into one of the planting baskets provided with your iDOO system.
Ensure the rockwool cube fits snugly within the basket, providing support for the seedling. Carefully place the planting basket into one of the designated pod spaces in the hydroponic system. Repeat this process for each seedling. Avoid overcrowding; allow sufficient space between plants for optimal air circulation and light exposure.
For larger plants, or those requiring more root space, transplanting may be necessary as they mature. Monitor root development and transplant to larger baskets if needed. Always handle seedlings gently to minimize stress and promote healthy growth.
Maintenance & Cleaning Procedures
Regular maintenance is crucial for optimal performance and longevity of your iDOO hydroponics system. Weekly, check the water level and replenish with purified water as needed, maintaining it between 2L and the MAX line. Avoid overfilling, as roots require air. Inspect the water circulation system for any blockages and clear them promptly.
Every two weeks, completely drain the system and thoroughly clean all components – the water tank, planting baskets, and grow deck – with a mild detergent and water. Rinse thoroughly to remove any soap residue. This prevents algae buildup and bacterial growth. Wipe down the LED grow light panel with a soft, damp cloth.
Monthly, sanitize the system with a diluted hydrogen peroxide solution (follow product instructions carefully) to eliminate any lingering pathogens. Always disconnect the power supply before cleaning. Proper cleaning ensures a healthy growing environment for your plants and extends the life of your iDOO system.
Troubleshooting Common Issues
Problem: Plants aren’t germinating. Solution: Ensure rockwool is adequately moistened, and water quality is purified. Maintain consistent warmth. Problem: Slow plant growth. Solution: Verify correct lighting mode for the plant’s stage. Check nutrient solution concentration and pH levels. Ensure adequate water circulation.
Problem: Algae growth in the water tank. Solution: Regularly clean the tank (every two weeks) with a mild detergent and consider using an opaque water tank to limit light exposure. Problem: Pump not working. Solution: Check the power connection and ensure the pump is submerged in water. Inspect for blockages in the pump intake.
Problem: LED lights not functioning. Solution: Verify the power connection and check the control panel settings. If issues persist, contact customer support. Remember to always disconnect the power before any inspection or maintenance. Consistent monitoring and prompt attention to these issues will ensure a thriving hydroponic garden.
Q&A: Germination & Water Level Best Practices
Q: What water should I use for germination? A: Purified water is highly recommended for optimal seed germination and to prevent introducing contaminants. Tap water can be used if it’s been left standing for 24 hours to allow chlorine to dissipate.
Q: How often should I change the water? A: Replace the water entirely every 1-2 weeks, or as needed if it becomes cloudy. Regularly top off the water level to maintain optimal nutrient concentration.
Q: What is the ideal water level? A: Maintain the water level between 2L and the MAX line indicated on the tank. Do not exceed the MAX line, as this can drown the roots and restrict oxygen intake. Roots require air for healthy development.
Q: My seeds aren’t germinating – what’s wrong? A: Ensure consistent warmth, adequate moisture in the rockwool, and proper lighting. Patience is key; germination times vary by plant type. If problems persist, try a different seed batch.
Optimizing Growth for Different Plants (Herbs, Vegetables, Fruits)
Herbs (Basil, Mint, Parsley): These thrive with 14-16 hours of light daily, utilizing the ‘Vegetative’ mode. Frequent nutrient solution changes (every 1-2 weeks) are beneficial due to their rapid growth. Pruning encourages bushier growth and prevents flowering, maintaining flavor.
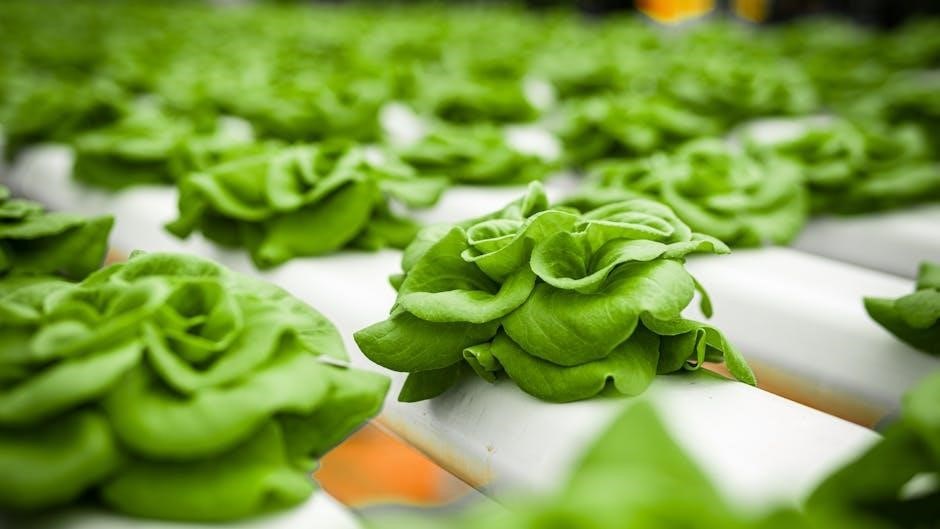
Leafy Vegetables (Lettuce, Spinach, Kale): Similar to herbs, 14-16 hours of light in ‘Vegetative’ mode is ideal. These require consistent moisture and nutrient levels. Harvesting outer leaves allows for continuous production.
Fruiting Vegetables (Tomatoes, Peppers, Strawberries): Transition to the ‘Bloom’ mode once flowering begins (12-14 hours of light). These plants benefit from increased nutrient concentrations, particularly potassium, to support fruit development. Hand-pollination may be necessary indoors.
General Tip: Monitor plant health closely. Adjust lighting and nutrient solutions based on observed growth patterns. Smaller plants generally require less nutrient concentration than larger, fruiting varieties.
Software & Technology Updates
iDOO is committed to continuous improvement! Our hydroponic systems leverage smart technology, and we regularly release software and firmware updates to enhance performance and introduce new features. These updates optimize lighting schedules, nutrient delivery, and overall system efficiency.
Automatic Updates: Many iDOO systems feature automatic over-the-air (OTA) updates. Ensure your system is connected to a stable Wi-Fi network to receive these automatically. A notification will typically appear on the control panel when an update is available.
Manual Updates: In some cases, manual updates may be required. Visit our official website (example website address) and navigate to the ‘Support’ or ‘Downloads’ section. Locate your specific model (ID-IG201 or ID-IG301S) and download the latest firmware.
Important Note: We will not provide individual notifications for every update. Regularly check our website for the newest versions. Updating ensures optimal functionality and access to the latest advancements in hydroponic technology.
Warranty Information & Customer Support
iDOO stands behind the quality of our products! Your iDOO Hydroponics Growing System is covered by a [Specify Warranty Period ⎼ e.g., 1-year] limited warranty against defects in materials and workmanship from the date of original purchase. This warranty does not cover damage resulting from misuse, accidents, or unauthorized modifications.
To initiate a warranty claim, please contact our dedicated Customer Support team with your proof of purchase and a detailed description of the issue. We may request photos or videos to assist in the diagnosis.
Customer Support Channels:
- Email: support@idoogrow.com
- Website: www.idoogrow.com/support (FAQ, troubleshooting guides, and contact form)
- Phone: [Specify Phone Number] (Operating hours: [Specify Operating Hours])
We are committed to providing excellent customer service. Our team is available to answer your questions, resolve issues, and help you achieve successful hydroponic gardening. Please retain your purchase receipt for warranty purposes.